
The challenge was to deliver a scale model of an offshore pull-in and hang-off (PiHo) assembly for an Aberdeen based company that would be used both in presentations and meetings. The model would need to be of a suitable scale such that it provided useful insight and learning for the interested parties and would also be capable of being transported in luggage.
The basis for the 3D print
The real-life assembly serves as the topside components of an offshore wind farm power cable for use when recovering the cable from the seabed for installation. Cranes and winches would connect to the ‘pullhead’ and bring the cable near to the surface and through an I-Tube for hang-off and hook up. The real-world assembly would amount to over 10m, and so a suitable scale was required to produce the model for use in general handling and discussion.
The assembly is made up of several smaller parts, each bolted and interconnected with each other and the aim for the 3D print was to allow for the model to be assembled and disassembled using actual nuts and bolts. This would make the model suitable for travel when required but also provide opportunities for learning and product development.
Modelling the components
PDF CAD drawings were supplied for each of the components, and from there the elevations and plans were extracted with AutoCAD and arranged in 3D space using Autodesk 3ds Max. Various techniques were used in the modelling process including creating profiles and using Lathe operations to quickly build 3D shapes.
Appropriately sized holes were added where required, altered at scale to suit a selection of M2 to M4 bolts. Many of the detailed features in the parts were achieved with ProBoolean compound objects using the Subtraction command. This is always a quick and convenient method of creating models, especially for forming bolt holes and cutaways.
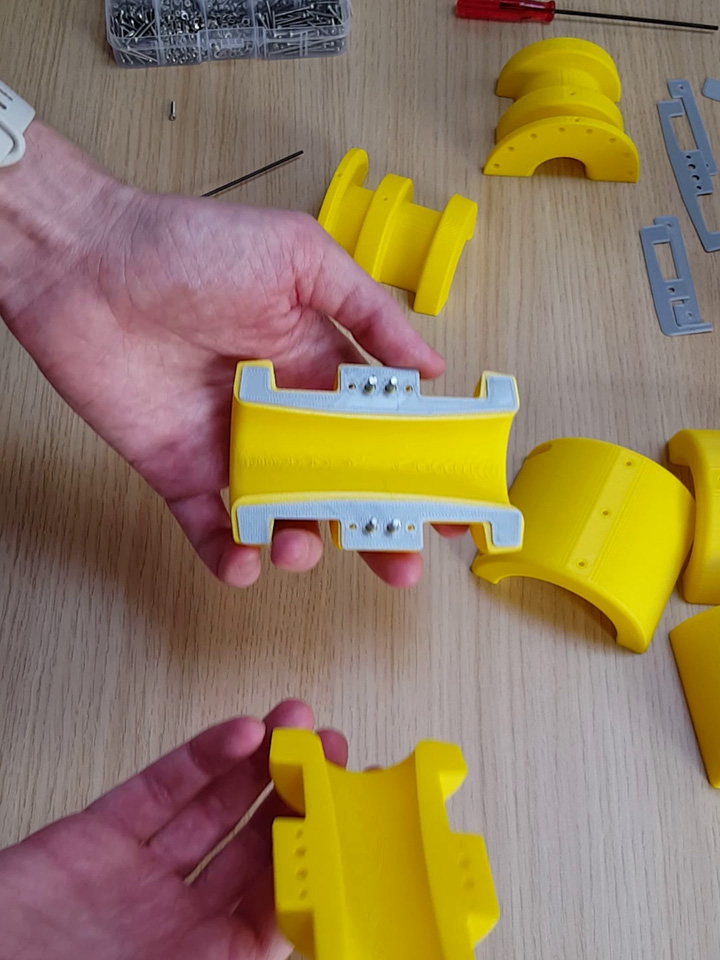
In all, over twenty different parts were modelled and printed (some were printed in multiples for the required assembly).
Slicing
All parts were ‘sliced’ using UltiMaker Cura which is a great choice for working with a range of different printers and settings options. The parts had been modelled with high detail (high numbers of faces) to ensure smooth prints, and having selected a scale of 1:6.25 (or 16%) it proved to be a great mix of print size vs acceptable print times. It was important to create as light a model as possible due to the construction of the assembly and the fact that various parts would be essentially supported by the next in the chain and as such a low infill was used. With so many curved parts, they have an inherent strength due to the wall thickness of the print itself.
Even at this scale, aiming for a model of around 1.5m to 2m in length, the collective print time would be considerable. Using multiple machines therefore is essential.
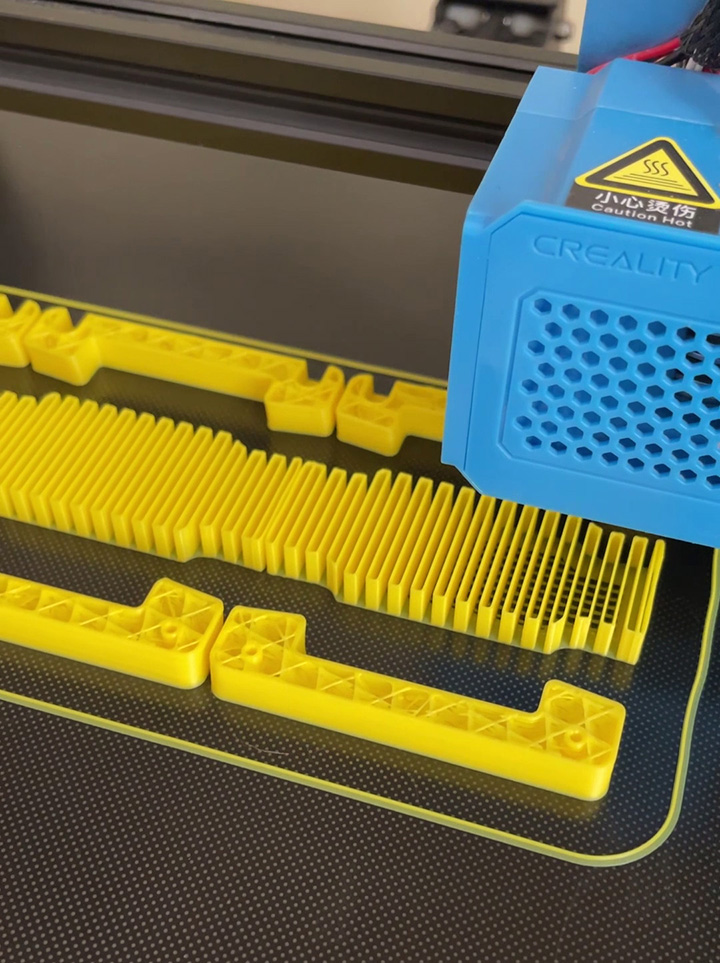
Printing
All parts were printed with larger format machines, using standard PLA in suitable colours to mimic the real-life versions. The advantage of larger printers is that parts can be printed in one piece requiring little or no gluing and finishing. The print quality was high enough that no sanding or spraying would be needed, which is a great advantage. In fact, most parts could be removed from the build plate and added to the assembly straight away.
Assembly
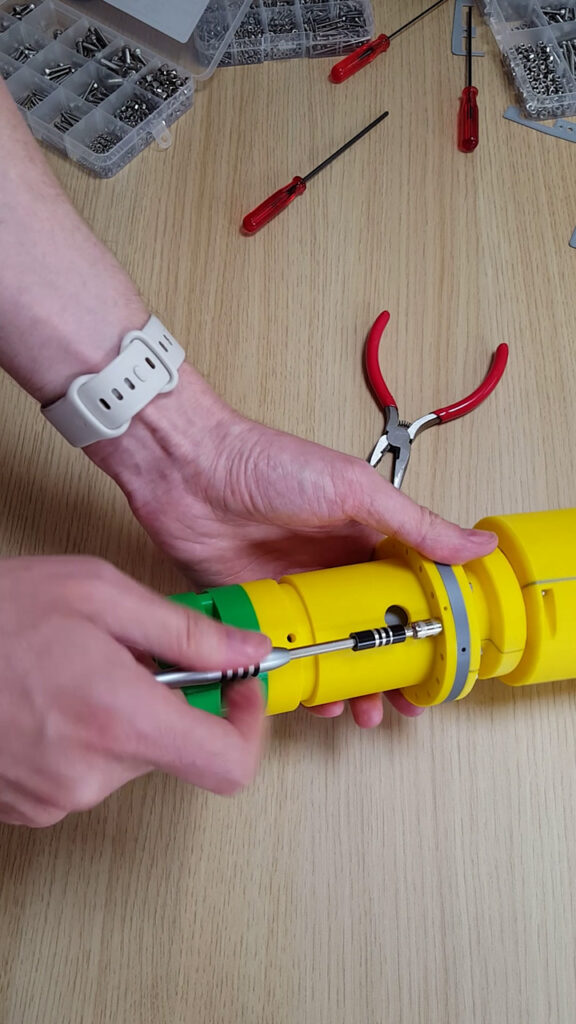
Parts were assembled using various M2 to M4 hex socket bolts and nuts. With the bolt holes such that the steel hardware would ‘bite’ into the plastic without the need for tapping.
This is a great way to create components that can be bolted together and taken apart when needed. Socket head bolts at this scale mimic the full-size versions so are a perfect way to fasten parts together. They also add a sense of legitimacy to the overall build as users can really get a feel for the way the assembly is put together, even at this smaller scale.
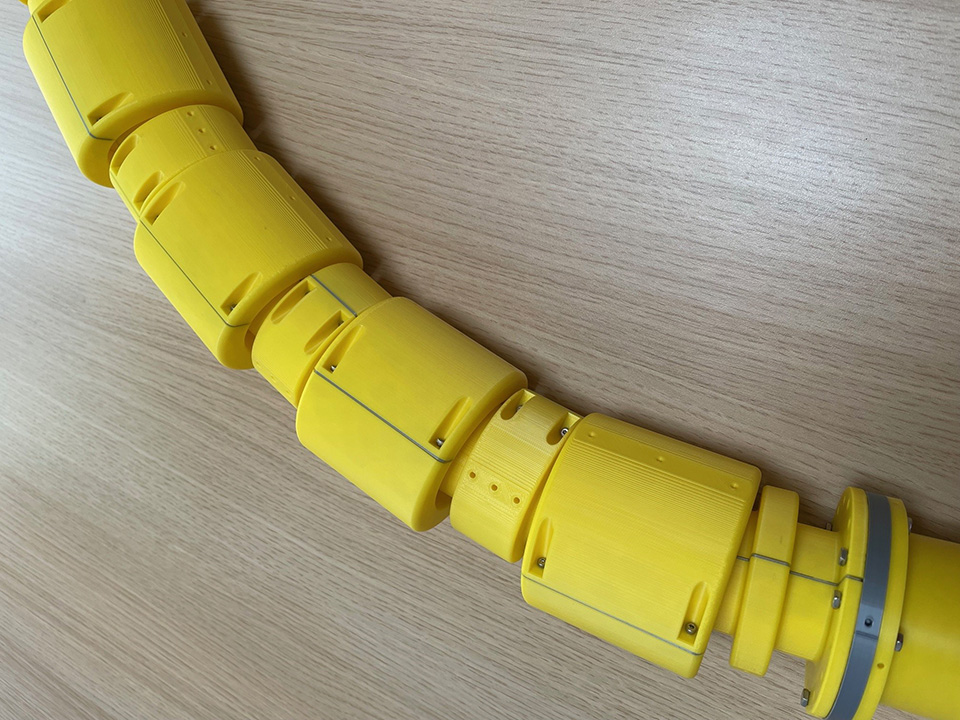
Completing the project
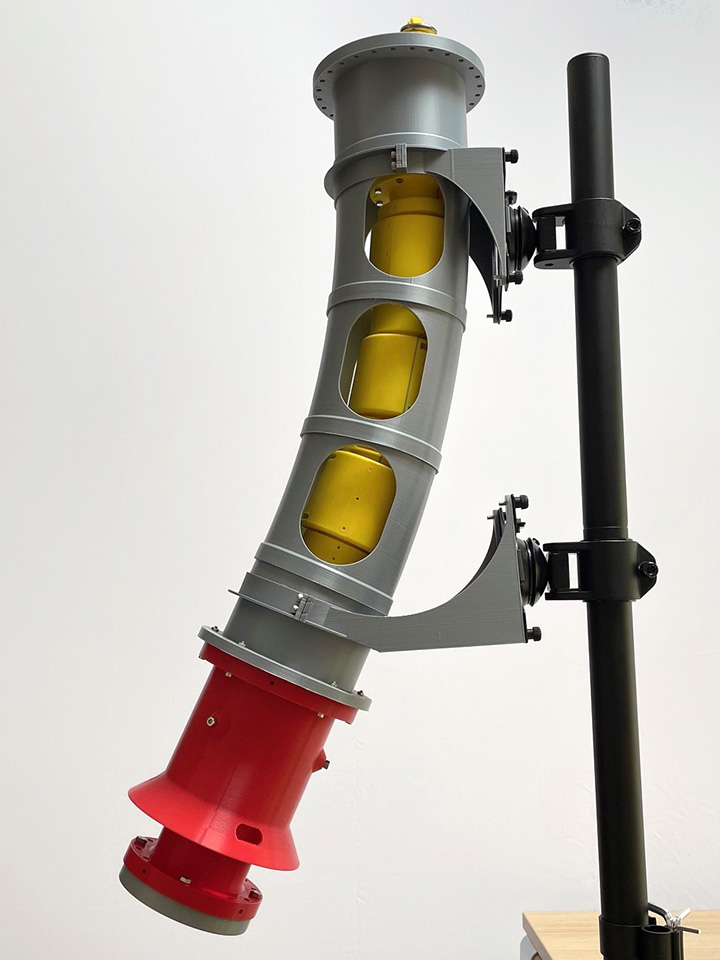
The model was displayed with a desk stand where the I-Tube component was fitted with a pair of custom clamps that interfaced with the existing metal plates. This allows for the PiHo (Pull-in and Hang-off) to be shown moving in and through the I-Tube as in real life, with the addition of some bolts which allow for the assembly to operate with its connection and release mechanism represented. A PVC tube with three smaller diameter tubes running through it was then added to the assembly to represent the power cable. This finishes off the build and helps demonstrate how things will work in real life, with the assembly being used in meetings and presentations to aid in discussion and understanding.
It was great to produce the pull-in and hang-off assembly given that it furthers our capability to deliver effective, large-scale 3D printed models in Aberdeen directly for our clients. If you have a project that would benefit from being represented as a 3D printed model, then please use the Contact page to get in touch.
Here’s a video showing the various stages in producing the model, from working in the CAD software through to assembling the various parts along with its display stand.